
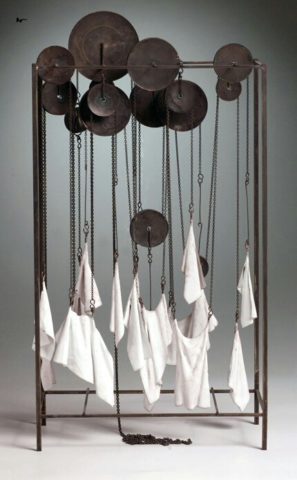
Untitled (Tenement), 2007, 17″ x 8″ x 4″, copper, brass, chain
Enameling is an art, but it is also a technical process, and part of the art is solving the technical challenges. As enamelists know, these challenges inevitably seem to arise when one is working alone, often with limited equipment and access to resources. Creativity and a willingness to experiment are assets, and so is knowing where to find advice. Such problem solving is worth it, as expands the parameters of the medium. Our blog editor, Lauren, works with enamel as well as writes for a living, and she has shared with us her problem-solving process for a recent piece. Please feel free to comment on her post and add your own insights.
-Judy Stone
I recently accepted a commission to create a larger version of a small sculpture I made years ago. The original, about 17″H x 8″W, would need to be scaled up to about 4 or 5 feet tall, which presented a few challenges. How would I replicate each part at a larger size? What should the final size be? I knew I needed to outsource the assembly of the frame and discs to a steelworker, as that exceeded my studio’s capabilities (and mine). I found a thick copper chain that mimicked the industrial look of the original at the correct scale, and I could forge connections from thick copper wire I bought at Home Depot. That left the white hanging elements, which were formed from copper and enameled.
In the original, these were only a few inches tall. I realized that the final size of the scaled-up version would be limited by the maximum size of the work I could fit in my kiln, a Vcella model 13, with interior dimensions 12″ x 12″ x 8″. I figured I could make pieces as large as about 15″ long, if I could set them in the kiln diagonally. Based on the proportions of the original, this would allow me to increase the dimensions by a factor of about 4, for a final height of about 5 1/2 feet.
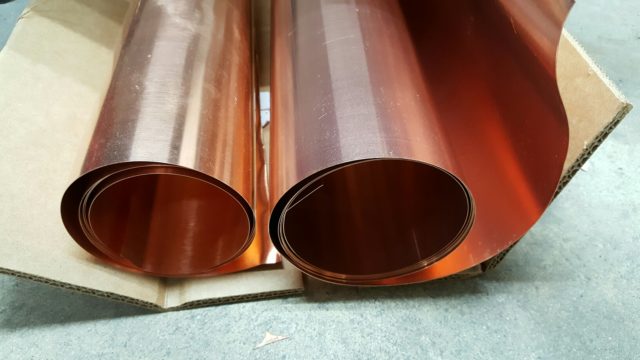
Sheet copper
For the copper, I experimented with both 26 and 30 gauge sheet (I got mine from Basic Copper), and settled on 30 gauge for its combination of strength and pliability when annealed to dead soft. For the enamel I chose Thompson liquid 533, a white I liked for its opacity and the luminous, chalky finish that it took with an acid etch. The folks at Thompson advised me to buy a 5lb box in powder form. Easier to work with than the pre-mixed liquid, they said, and a better value for a large project like mine.
I heated the copper in my kiln to anneal and degrease it, set to work at my bench, and soon had a whole flock of formed pieces. I heated each one again to degrease.
Now for the enameling.
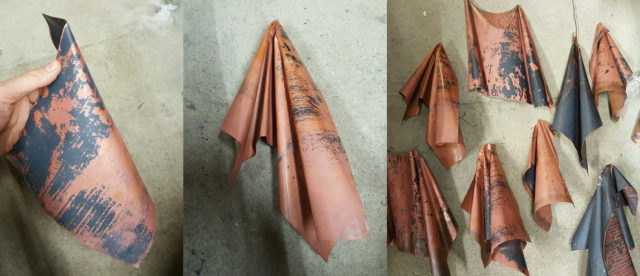
Forming pieces to be enameled.
I started by pouring on thick yogurt-consistency enamel, using a wide brush to spread it into crevices. I tapped and shook the piece until the enamel covered evenly and brush marks disappeared, then dried it with a heat gun until the water steamed off. My initial firings looked good except for a few small areas where the enamel was lumpy and had even peeled up from the copper in places. Was it a residual area of grease, or clumps of powder in the liquid? In previous projects I had found the 533 to be easy to work with, with good coverage that hid a multitude of sins. I figured the issues would resolve with additional firings.
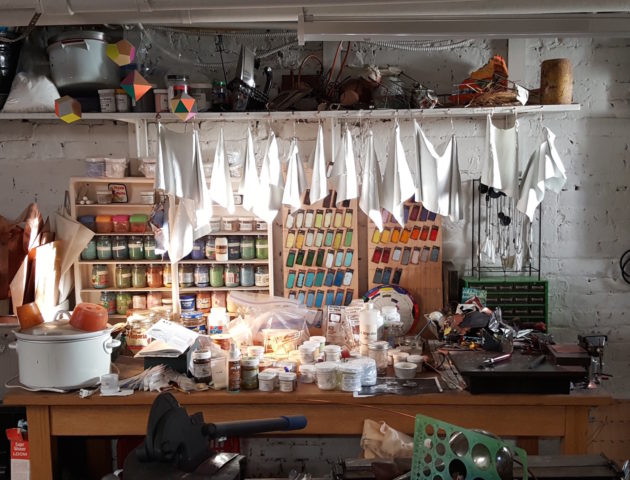
My basement workbench.
As I continued to work, though, the trouble spots kept popping up, unpredictably. The lumpy, uneven splotches were impossible to smooth or cover. I needed some expert assistance. I called Thompson Enamel, and was connected to Tom Ellis, the company’s chief product developer. Talking to him was like pulling back the curtain on the Wizard of Oz. Ah, so this is how the magic happens!
Liquid enamel wants to contract into balls when it melts, he told me, and this tendency is exacerbated when the surface to be enameled is uneven. Were there ridges or creases in my copper? There were, where I had overworked it or changed the shape more than once or twice. Dipping might help, he said, or spraying, if I could get my hands on an industrial sprayer (I couldn’t). Barring that, I should try to keep the copper as smooth as possible. I wondered if firescale could be a problem, because I had not tried to avoid it, but he assured me that it was not.
I kept testing pieces, discarding a great many failures, and trying to improve the process. The biggest issue seemed to be getting the enamel to flow smoothly over the copper. I noticed that areas of the copper that were wet when I applied the enamel seemed to take the enamel much more thinly and smoothly, with no lumping or flaking. What if I thoroughly wet a piece under the faucet before pouring on the enamel?
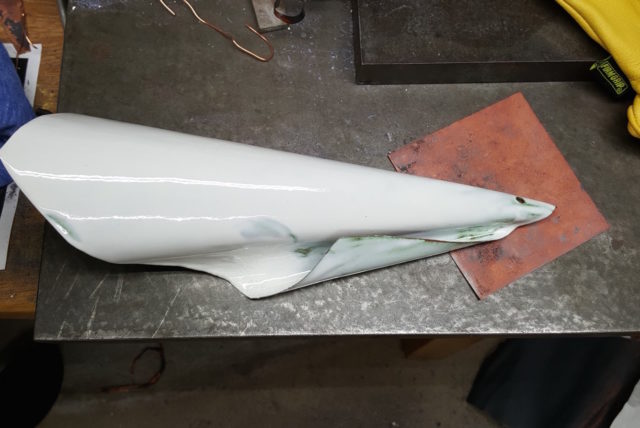
That worked.
Applying enamel to wet copper produced a thin, uniform, super-smooth layer that took additional coats easily. Dark green oxidation was visible in the thinner spots under the enamel, but this disappeared with an additional coat, and I didn’t mind it anyway. I experimented with Klyr-Fire, but it didn’t work as well as plain old water.
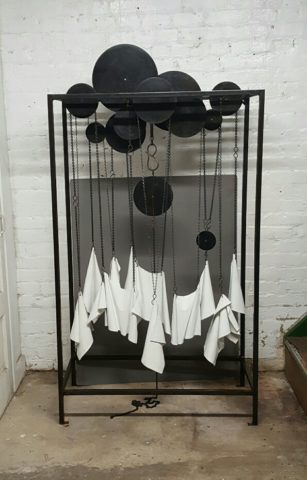
Final! About 5 1/2 feet tall, the piece will be installed in a restaurant in London.
Working against a deadline, I was glad I had not waited to start the enameling. Working larger was not simply a matter of sizing up. It required a different way of thinking and a different set of techniques.
It also changed my ideas of what I wanted to make. I had always worked small, using the techniques I had learned studying jewelry-making. But challenging myself to work large made me see new possibilities in enamel as a legitimate sculptural medium. I imagined large forms, perhaps with welded steel frames, clad in enameled copper — forms that had both the physical presence of sculpture and the subtlety and expressiveness of color. Now, there was more to learn. –LP